Out of Stock Scanning
Ventor App
- Open Inventory Adjustment
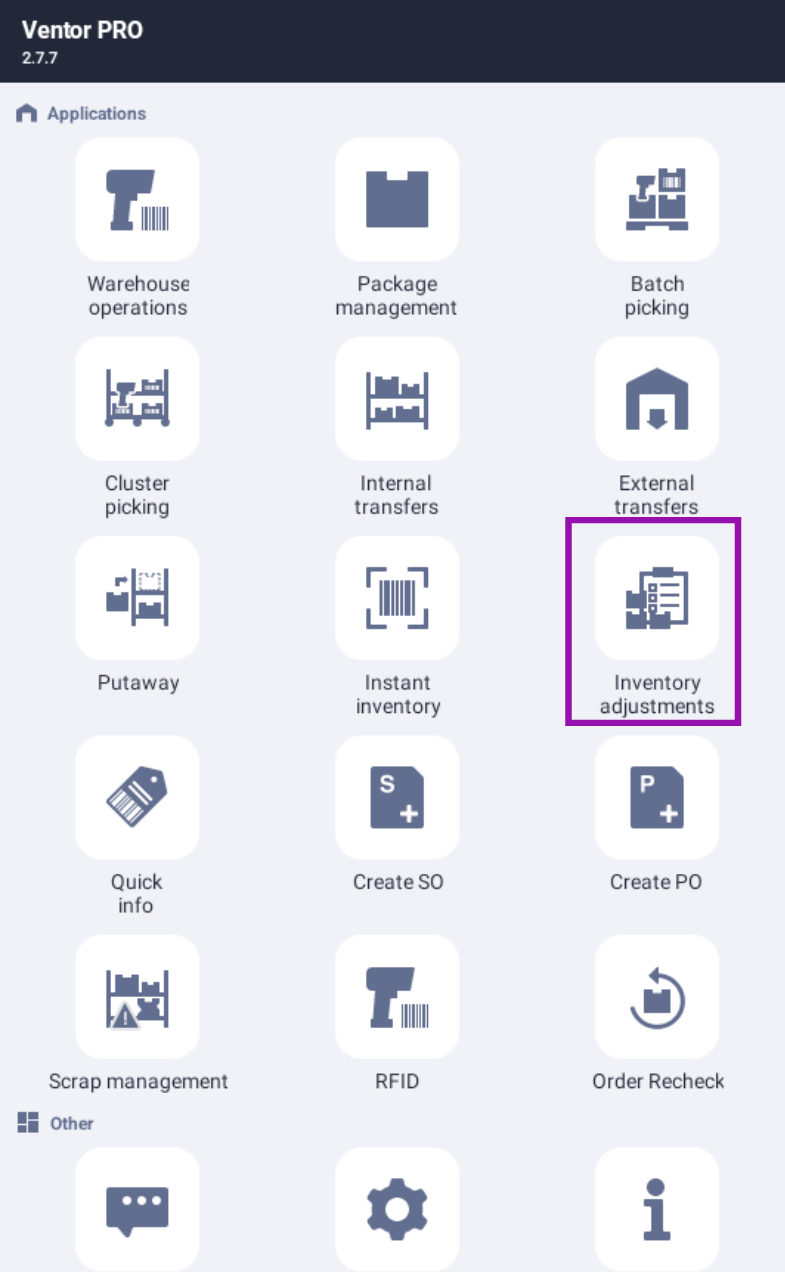
- Select Location
- Begin scanning holes (Product tag where no product is found)
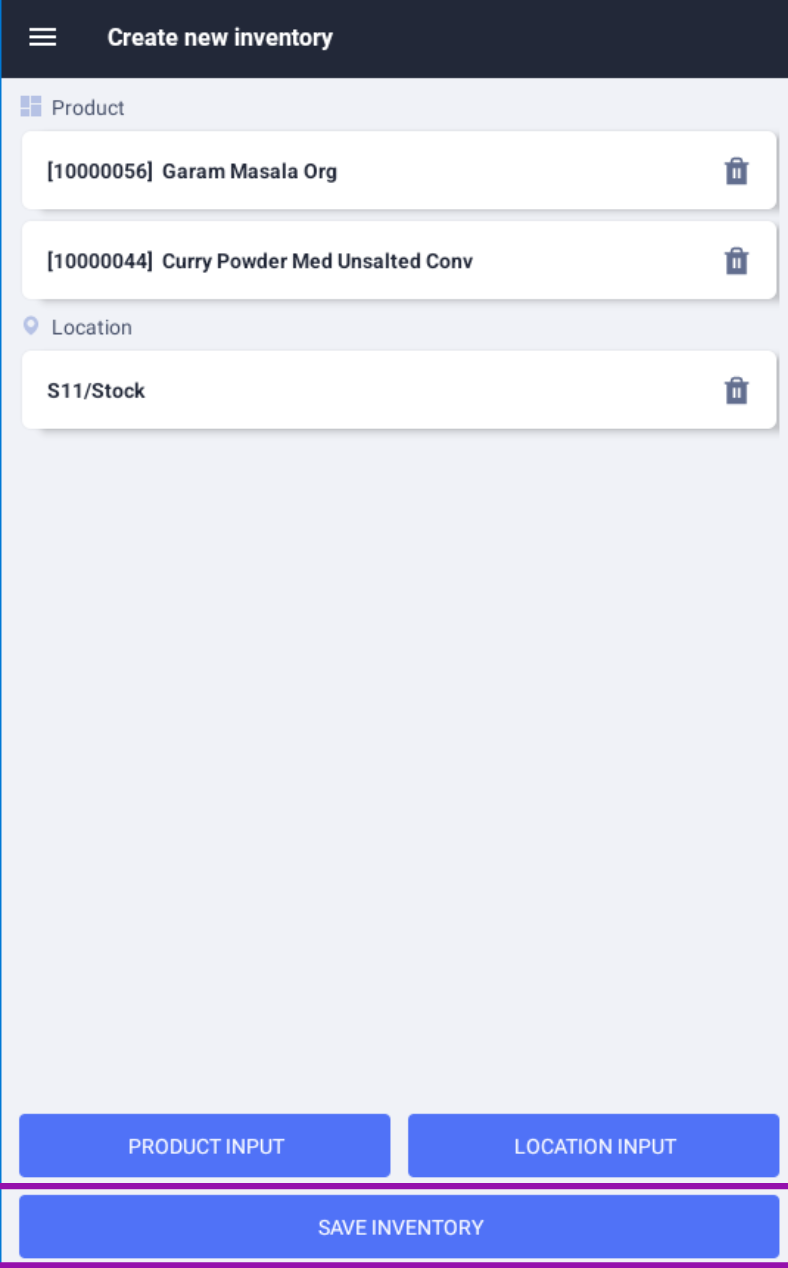
- Tap Save Inventory to finish scanning
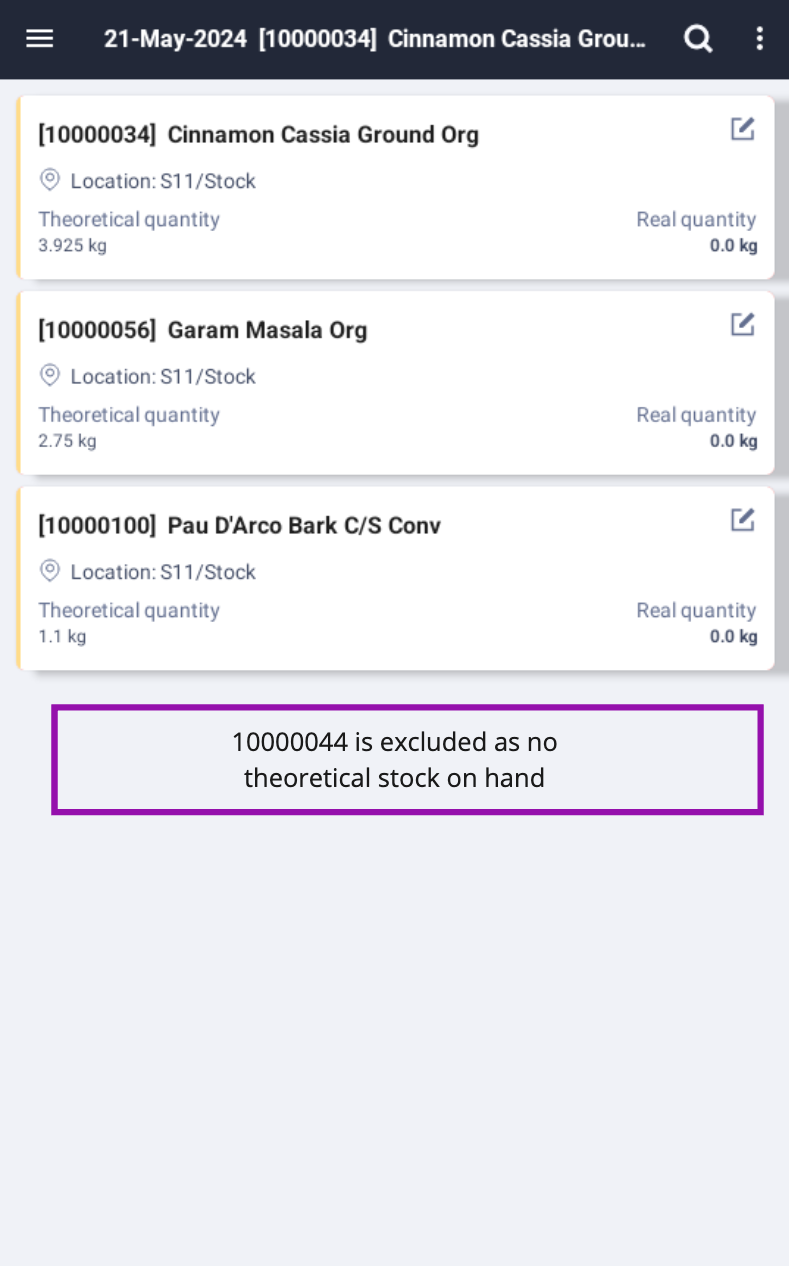
- Review Theoretical Quantity
- Look for missing stock
- If found, perform count
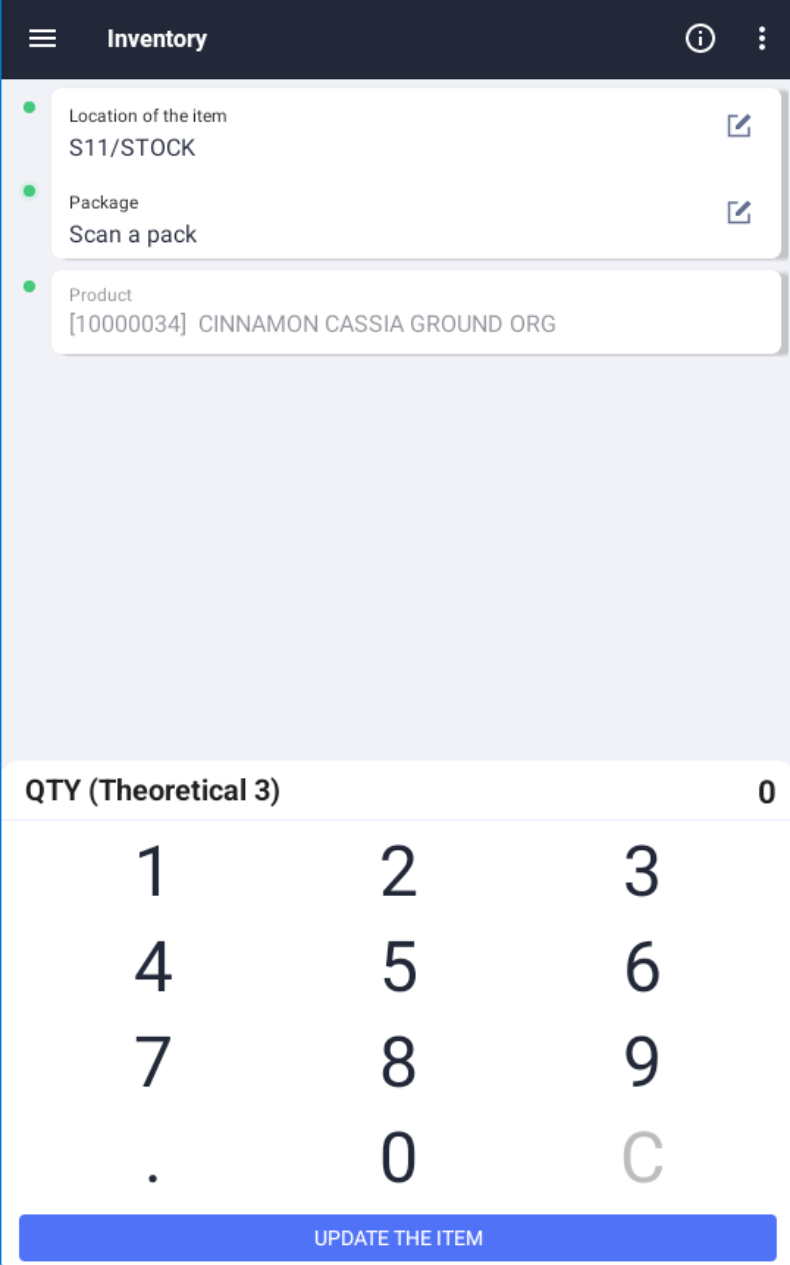
- Click on Update the Item to confirm
- Once finished, press back button on device to go back to the Ventor main screen
Odoo
Navigate to Inventory -> Inventory Adjustments
Open the In-progress Inventory Adjustment for the Location
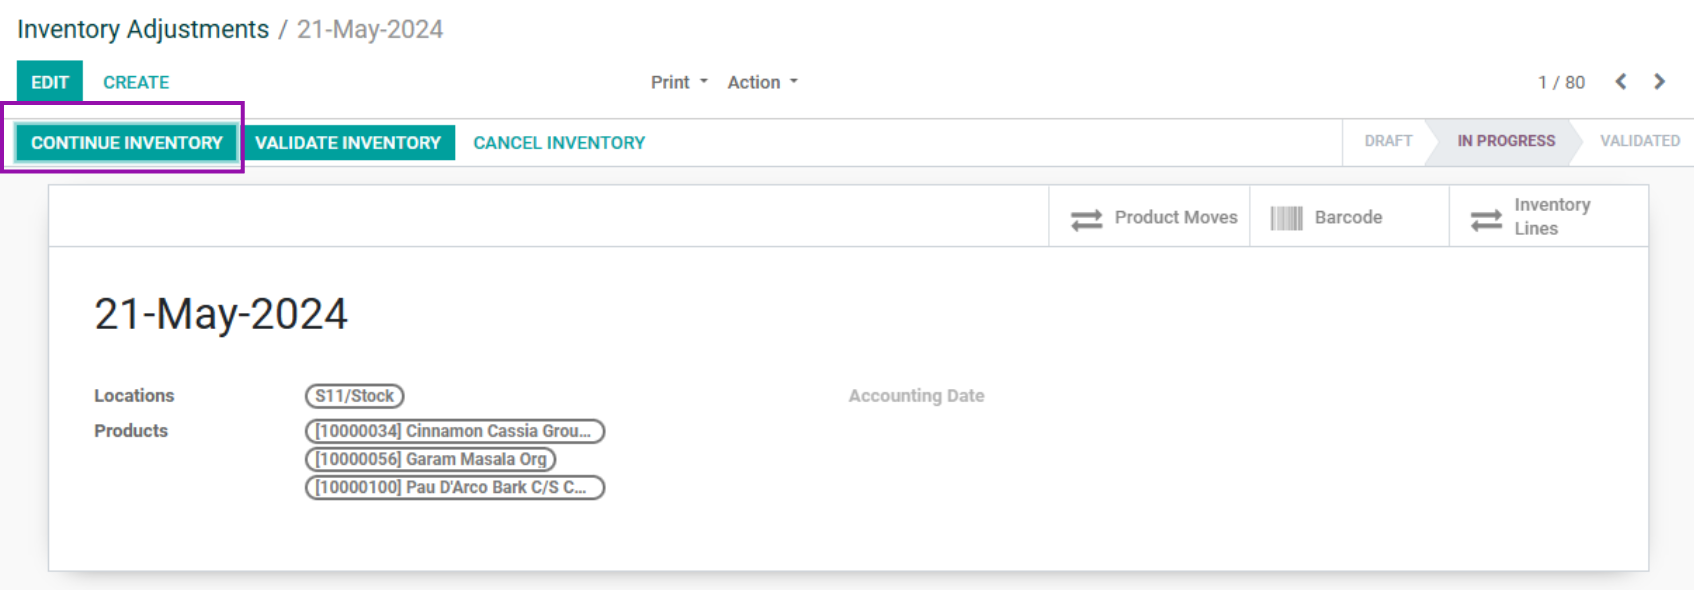
- Review the Out of Stock Report
- Check for major discrepancies
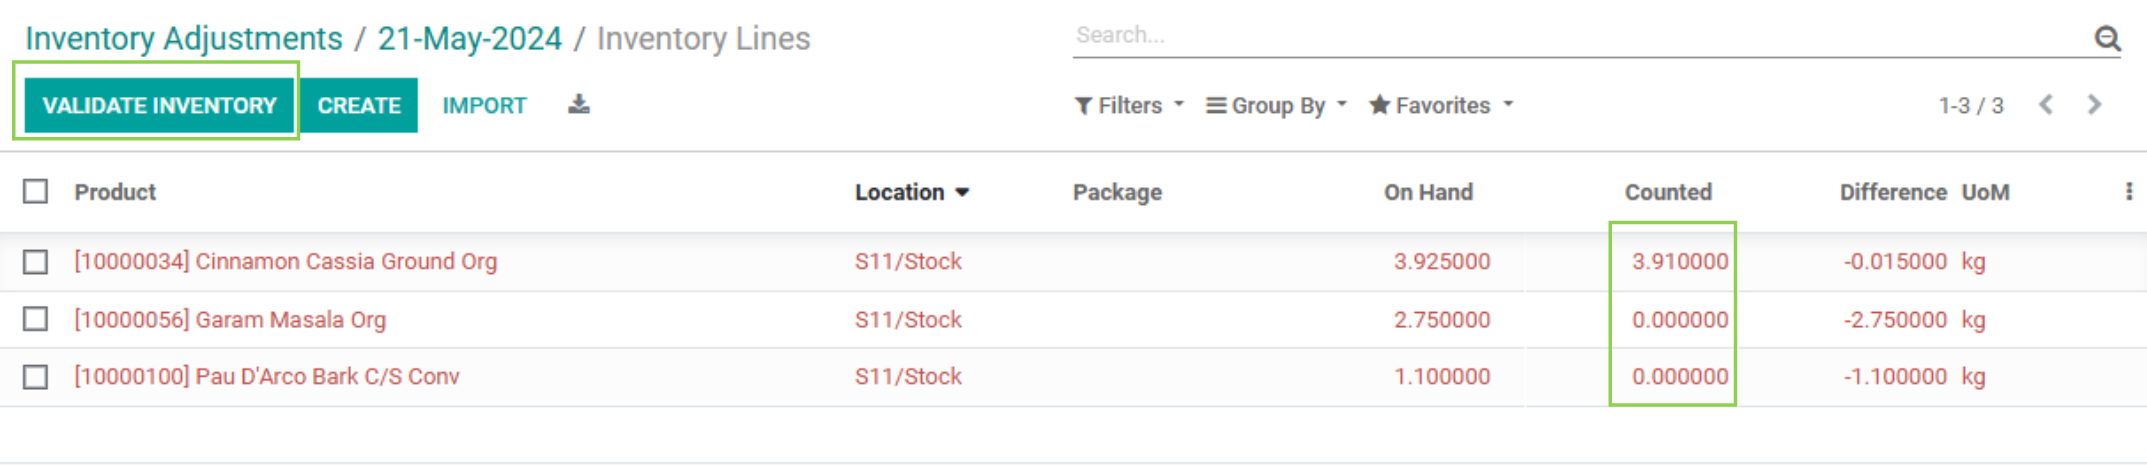
- Validate Inventory to apply
Training
Store Operations Team:
Ventor Logging In
1. Login
• Open the Ventor app.
• Enter your username and password.
• Tap “Login.”
2. Using Inventory Adjustment in Ventor**
• From the Ventor dashboard, tap on the “Inventory” module.
• Select “Inventory Adjustment.”
Scanning Product Tags
3. Initiate Scanning:
• Tap “Start Adjustment.”
• Use the device’s camera to scan the product tag barcode.
• Ensure the barcode is fully visible and properly aligned for accurate scanning.
Completing Initial Scan
4. Confirming Scans:
• Review the list of scanned items to ensure all missing products are accounted for.
• Tap “Save” to store the scanned data.
Searching for Missing Items
5. Physical Search
Updating Inventory Adjustment in Ventor
Modifying Records
6. Access Adjustment:
• Reopen the inventory adjustment module in Ventor.
• Select the ongoing adjustment session.
7. Update Records:
• For each found item, update its status in the adjustment record.
• Add notes or additional information as necessary.
8. Save Changes:
• Review the updated list.
• Tap “Save” to store the changes.
9. Close Inventory Adjustment
PFS Team:
Verifying and Validating in Odoo
Accessing Inventory Adjustments in Odoo
10. Login to Odoo:
• Open the Odoo application or web interface.
• Enter your credentials and log in.
11. Navigate to Module:
• From the Odoo dashboard, go to the “Inventory” module.
• Select “Inventory Adjustments.”
Reviewing Adjustments
12. Open Adjustment Record:
• Locate the inventory adjustment session initiated in Ventor.
• Open the record to review the scanned items and updates.
13. Review Data:
• Review Data for accuracy.
Validating Adjustments
14. Validate Records:
• If everything is correct, click “Validate” to confirm the adjustments.
• If discrepancies are found, make the necessary corrections before validating.